Quilters Lead Pieceful Lives.

Wednesday, October 17, 2018

Monkeying Around With Numbers

Got a request from Nancy, one of our travel friends, for a new baby quilt.  Her specifications were:
"It’s a boy. The “theme” should be MATH NERDS! The Mom is a high school math teacher and the Dad is a stock broker."!!!

What to do?  I looked around for fabrics with numbers and equations, but couldn't find anything that would work.

It is, after all, a BABY quilt!  So I wanted to satisfy Nancy's parameters but still have something that baby Eli would enjoy.

Finally found a very cute fabric with a pattern of numbers AND monkeys!  What could be better?

But then, what pattern could I use?

I played around and eventually decided to make one up based on a Fibonacci pattern. This is a sequence of numbers that is found in many places in nature!

                                                Image result for fibonacci sequence

You get it by adding the current number to the previous number. So: 0 + 1 = 1   1 + 1 = 2   2 + 1 = 3  3 + 2 = 5   5 + 3 = 8.....and so on.

Here is how it looks graphically.
                                            

If you connect the diagonal corners in each square (using a gentle curve), you get the "nautilus" or "fern" shape.

So...I designed the quilt using the 1," 1", 2", 3", 5", and 8" squares. This gives an 8" x 13" rectangle (as above). When you rotate each group 90 degrees and line up the outer edges, it creates a square in the middle. I used similar looking dotted fabrics in the usual red-orange-yellow-green-blue-purple (rainbow) colors, and put the monkey fabric in the middle square. To clearly separate the Fibonacci sections, I outlined each with a 1/4" mini-sashing in solid blue. I then used the monkey fabric as a wide border (and for the binding).

Quilting was done with rainbow variegated thread. I created cardboard templates with the appropriately sized and shaped curves for each square. Doing so allowed me to pretty accurately sew the Fibonacci curve. And notice the monkey tails and the random Fibonacci-looking swirls by each monkey!

The quilting on the border is a sine wave pattern .

Here is the finished quilt (front and back):


I hope Eli AND mom and dad like it. They can use it to teach him about the beauty and magic of numbers. Nerds rule!


Update:
Baby Eli and friend!!!


Saturday, October 13, 2018

Quilts for Sale!!!!

In the last 25 years I have made over 160 quilts! (Not to mention hundreds of reusable bags, many aprons, iPad covers, etc.).

The majority were made for a specific person. But a number were made just because I liked the pattern or wanted to try something new. These have beautifully graced our house (and also my mother-in-law's).

But, sad to say, the time has come to part with some of these. It will be hard to let them go, but I know that whoever buys them will love them as much as we do.

I have created a new blog label ("Needs A Loving Home") to help you find these quickly (click in right-hand sidebar), and have marked each (at the end of the regular post) with the size and asking price (which includes shipping in the US).

Check them out and let me know which ones you are interested in!

Wednesday, July 18, 2018

Rainbow Blocks

Seven years ago I made Sweetie Pie II for Skyler; this one is for her new brother Crew!

Crew's mom Jereme wanted something "colorful, but just with squares. No theme, no animal shapes."

So I came up with this pattern:

A rainbow of colors all based on a 6" block.

It starts on the outside with 6" RED squares.

Next is 6" blocks of ORANGE and YELLOW, but these squares are each 3" on a side.

Then a 6" block of GREEN made up of 2" squares.

In the center of which is a 2" block of BLUE made up of 1" squares.

All in all, there are 60 different fabrics!!! (and it's just 30" x 30".)


And one more wild rainbow fabric on the back!


The quilting was done with rainbow variegated thread and is all in the ditch except for the square in the middle of the outer red blocks.

And "Crew" was also monogrammed in a similar variegated thread.

Wednesday, May 23, 2018

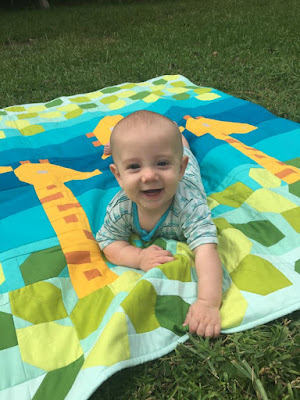
Awww! Giraffes!

Our travel friend Michelle requested a quilt for her about-to-be-born grandson Dashiell.

I previously made this one for grandson Decker in March, 2016. For that one, she requested elephants.

This time it was "giraffes...with some teal". I found a really cute pattern (hence the name we chose) from Sew Fresh Quilts. It had giraffes and a beautiful range of blues (I used the fabrics recommended in the pattern).


It is a bit hard to see (you may need to zoom in on the photo), but I used a decorative stitch to create a central "rib" in each of the leaves. The leaves themselves are in 3 shades of green, so the ribs are also done in similar-shaded greens.

I found a backing fabric that also is teal with a riot of giraffes!


For the quilting I used clear monofilament thread. I ditch quilted each of the horizontal rows, and then also ditched around each of the giraffes. Basically...it's invisible!

For the binding, I used leftover pieces of each of the 6 shades of blue. Each was then matched and cut to the same length as it's row counterpart (above and below the middle darkest one). By doing this, you can barely even see the binding! (It's actually more visible on the back.)

And now Dashiell has successfully arrived!  Hope he likes his new playmates.  


and a later picture:


Monday, April 2, 2018

NOLA Houses

Our daughter Emily lives in New Orleans (i.e., NOLA; you can see the quilt I previously made for Em's house here), and works for Habitat for Humanity (click for main web site or NOLA site). Last fall she was promoted to a new position which included her own office! So she asked me to make her a quilt of NOLA houses to put on the wall.

For those of you who have never been to New Orleans, you may not realize that it features an amazing variety of architectural styles. These range from one of the standard and ubiquitous styles, the "shotgun" house (a narrow house where the rooms are arranged one behind another), to the grandest of mansions in the Garden District. In between are many shapes and sizes, and often featuring the bright colors one usually associates with the Caribbean islands. Click here for a visual sampling!

So I had a ton of options to choose from . My original thought was to do a traditional block quilt with maybe 16 squares, and each square being some pieced version of one of these houses. 

But around this time my quilt friend Kathleen Warren and I got together for a working (well....really playing) session using her abstract quilt-as-you-go freeform technique.

She is a true artist with a definite eye for color and design. She helped me "cut loose" and just randomly build up a design on a pre-cut piece of backing fabric. The idea is to fill the space and then mount it on a 10"x10" pre-stretched canvas.

As I was doing this, the proverbial light bulb went on in my head. Why not do individual houses like this and mount them on these same 10x10 frames!?!?!  I love to mount my artwork on stretcher bars, but these have almost always been larger pieces; I had never considered doing an individual mounted block.

Then, these could be hung on her wall in lots of different arrangements and switched from time to time. Em liked the idea, and then we set out to decide which ones to do.

We definitely wanted to do her cute house (narrow, but not a true shotgun), and also wanted to do one of the popular versions that Habitat builds down there. I had decided that I would make 8 in total, so we began to look for others to use. We found a few, and I set to work.

As I do a lot, I "translated" these images into a grid pattern in Excel. I then made them using a combination of sew-and-flip, paper piecing, and fusing. So these are not "quilts" in the traditional sense; more fabric art. 

For the most part, I tried to match colors of the fabric house to those of the actual house  The hard part was portraying the dimensionality of each in the (basically) two-dimensions of the fabric. In some cases I think I succeeded; in others, the final versions have a flat look.

Each house has from 80 - 100 pieces! I then fused the completed houses onto the background (of grass and sky). Then, the completed piece was staple-mounted to the canvas frame.

After much work, we decided that 4 was plenty!

Here is each one; first the photo used as the model, then the actual fabric version.

First, the Habitat house (under construction):


Next: a double-wide (usually two shotguns joined with a common wall):


Then, a colorful and ornate beauty:


And finally: Emily's house!


Here they are just hanging around:


...and on site at the Habitat For Humanity office in NOLA with Em: