Quilters Lead Pieceful Lives.

Saturday, January 4, 2025

Turtle Time

This is the 30th quilt commissioned by my friend Mari, and the first one for this family. 

The original idea was for something "beachy" with surfboards, because the family recently moved from Hawaii to Tampa.

After some further discussion, it morphed to "palm trees with whales or turtles".  I looked at a number of patterns, but couldn't find anything that worked. We went back and forth and then the parents actually found a pattern they liked and forwarded it to me! That rarely happens.

It had water and sand and turtles! Perfect!


The main pattern is made from 72 blocks (8 across by 9 down). Each block begins with a 6" square. Then, I used a quarter-circle template to cut each into 2 parts. By then arranging the quarter-circle part with the other "half" from another color, and sewing them together along the curved edge, I ended up with 4.5" two-toned blocks (plus the full-sized sand block in the bottom left). I used a number of batik colors to shade the waves across from deep water to shallow water to seaweed-water to sand.

Then the turtles. The pattern provided a template, which was the big turtle. I thought that making all the turtles this size would take up too much room, and also that having a variety of sizes would add more interest. So the middle 3 were scaled to 90%, and the little guy was at 85%. This also gave me the opportunity to use different fabrics to represent their life cycle. In this world, their shells, head and appendages get darker as they age and grow.

Each turtle is actually made of 6 pieces: the head, the body, and the 4 legs. The fabric was put on double-sided fusible webbing. Once the quilt top was complete, I arranged them as shown and fused them in place. But since this quilt will be used (a dragger instead of a hanger), and most certainly washed, I thought that they might start to fray and come off over time. So, I whipstitched them in place using a single strand of thread (each turtle took about an hour to do!).  If you zoom in on the above photo you can see this stitching.

Then the top was framed by more blue batiks, reinforcing the feeling of water.

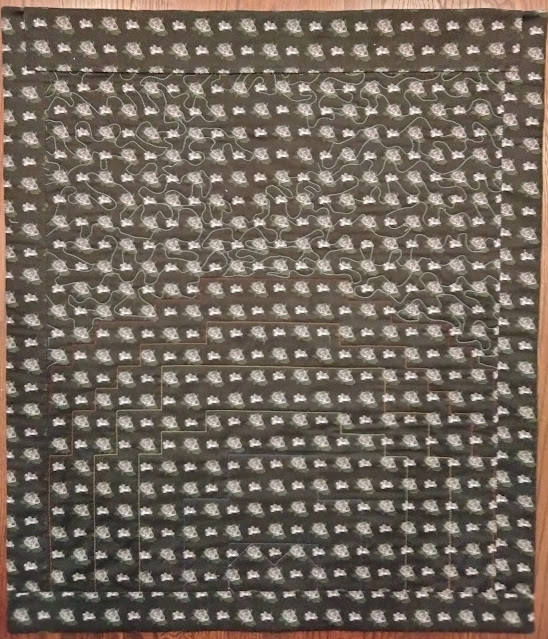
For the back, I found a fabric with colorful turtles (perhaps a different species!).


You can see from this photo that the quilting is a simple ditch pattern. I followed each undulation with a matching color thread, switching colors at each curve. Thus, as usual, it is basically invisible on the front side.

Have fun at the beach, Miles!  


Monday, October 21, 2024

It's A Hoot!

This quilt is for the new brother of twins Eloise and Wesley.

The request was for an owl, in sage and olive green. I found this pattern at Bound Shop. We really liked how the owl popped on the muted background.

The pattern, as written, provided the actual fabric colors from the Bella Solid line by Moda. But for the owl itself, these were in two shades of blue (plus Maize, Bronze, and Coffee). So it was easy enough to go find excellent substitutes of celadon and celery from the same line. 

We replaced the solid gray and cream fabrics in the background with ones of tiny white dots on white and green dots on cream.  


I did free-motion quilting in the darker green areas to simulate feathers. Also did free-motion on the face in gray. Then some angled straight line quilting in the orange areas. Different feather pattern? Whoooo knows. Finally, I ditch quilted with white on all the horizontal lines in the background.

And whoooooo's it for? Baby Thomas!  


Monday, August 12, 2024

QFL

One of the students in my ESL class is an amazing artist. Her favorite motif is repeating shapes, often with a geometric arrangement. Several times over the last two years, she made bookmarks for every other student in the class, each featuring a unique design!

This spring, she presented me with this piece:


 Beautiful, right!!!! And it is only 5" x 6"!

She knows that I am a quilter (we have shared our work with each other), so she said she hoped I could make a quilt based on this design. Challenge accepted!

The first thing to take note of is this: Clearly there are 12 wedges (thus, each must be 30 degrees). At first sight, it appears that it is the same segment repeated 12 times. But look again closely. If we start at the top middle and go clockwise, you can see that the odd sections (1, 3, 5, 7, 9, 11) are slightly different from the even ones! If you still can't see it, look at the shape of the black "triangles". 

The best way to create such wedges, with their crazy angles and small pieces, is with the paper piecing technique. That meant I would need to create a pattern for the 6 odd-numbered wedges and a slightly different pattern for the 6 even-numbered wedges.    

Her design of each wedge initially appears to be very simple. Some stripes and rectangles and lines. 

How to translate this into fabric? 

I used this design as a starting point. No way would I try to find fabrics with the exact patterns on her drawing. Trying to do so and getting them in complementary colors would be a fool's errand.  So, I would have to use fabrics that gave the same feel or appearance as the original.  

How big to make it? Obviously, having a finished quilt at 5" x 6" is somewhat foolish (unless you're decorating a doll house), and to do a paper pieces one of that size would be next to impossible. I did some rough calculations and came up with a workable length of about 11" for the longer edges (the left side of the odd pieces!); the edges of the odd pieces are a little shorter. The outer background could then be whatever extra size would make sense overall. This would give a total size of about 22" x 24". 

Once I made that decision, the next question was how much of her design should I try to replicate? Since each wedge was fairly small and made up of a number of pieces, I had to eliminate some of the smaller details. So I took a copy of her original, and, using paper scraps to "edit" and drawing in some revised lines, I came up with a design that could be done in cloth. Since each wedge is made up of several different fabrics, the total amount of any particular one is very small (less than an eighth of a yard). 

At that point, it just made sense to use fabrics I had in my stash. The original is blue, and blue is my favorite color, so naturally I have the most fabrics in that color. But try as I might, I could not find the right ones to work here. 😒 The greens seemed like the next best candidate, and yes!  I found just the right mix of colors and patterns.

Everything was falling into place!

Next I went to the local copy shop to make a full-sized enlargement. 400x ought to do it:


I then used special paper-piecing paper to trace each odd and even segment. Then I had to cut each of those into the sub-sections. For example: there might be A1 and A2 as one subset in an Odd wedge; B1, B2, B3 as another. Then draw the seam allowance around each and mark each sub-piece with an identifier for the correct fabric. Then make a final copy (actually 6 of each) for the odds and evens.  

Next: putting it together. It was just a matter of sewing each sub-section together, then sewing Set A to Set B, etc., then sew the wedges together.  One difficult part was the white outer background. These parts were not included as part of the wedge since:

a) it would have been too big to fit on one sheet of paper, and 

b) each white area is a little different based on which wedge (1 - 12) it is attached to. 

So after making each wedge, I just added a large piece of white in roughly the shape needed. Then I trimmed them to fit.  Looking back now, it would just have been better to add large white triangles (and the strips on the sides) after each 3-wedge group had been sewn together (fewer background seams that way). 

I also decided to put a thin green border which echoed the thin fabric strips in the wedges.

Quilting was minimal: ditch quilting on the 12 wedge seams using clear monofilament thread. Then a ditch of white thread in the background - border seam.


Finally, I wrapped it canvas-style around wooden stretcher bars. It's now ready for hanging.

Hopefully, this does justice to the original.

I will be gifting this piece to my artist-student-friend. But you may have noticed that this quilt does not yet have a name. I asked her what she called her original piece and she said there was no title for it. We tried to think of a name, but couldn't come up with one. So I am asking my loyal followers to submit their suggestion (either as a blog comment or directly to my email). We will pick the best one and then I will give her the quilt (and update this post). 

Thanks to all who submitted name suggestions. As you can see, the winner was "QFL". What does that mean? Quilting as a First Language!  Because art is the language that all people speak and understand. 


Monday, June 24, 2024

Zig Zag I and Zig Zag II

Every quilter has a stack of projects that they will get to "some day". One of mine has been this design, which was sent to me by my daughter in 2012!


I found it interesting because of the shape of the triangles, as well as the opportunity to use different fabric patterns. I also liked how the quilting reinforced the shapes.

However, we did not like the orange on black; too Halloweenish.

And notice that some of the fabrics are repeated on the left and right sides. Unless you were going to make it symmetrical, why do that when there are so many patterns available?

Having nothing to go on but this photo, I first had to decide how big to make my triangles. You can see that each pair is made up of an orange and a black. They are right triangles, so each pair makes a rectangle. So simple! Along with determining the triangle size, I had to decide how many to make in each half.  I didn't want the finished piece to be too big. I could have a lot of small triangles or fewer larger ones. I played around and finally settled on a finished size of 2" x 8" for the side and base (you can figure out the hypotenuse if you wish).  This size then worked well with 10 sets. I made a cardboard template, adding the 1/4" seam allowance all around. The same template was used for the colored fabric and the black background fabric.

Next....what color? Not orange.  White would be a good contrast, but the patterns on the fabrics would be too subtle. Yellow? Maybe. Purple? Not enough contrast. OK.....blue or green?  Wait!?!?! Why not make one of each? 👍👍   

So....let's find 20 different green fabrics in the stash. Want some contrast, some interest, not all dots or batiks; stripes might be problematic. How about this one? No, that one. Move it here...no there. Eventually we had over 30 pieces cut and up on the design wall before deciding on the final set and arrangement. Sew the green triangles to the black ones, sew the 10 sets in a column, sew the 2 columns together, add extra black fabric on the four sides and presto! And I knew up front that I would mount these on stretcher bars, so I added enough black fabric to wrap around.

As mentioned above, I like the echo quilting, but I didn't want to do it in green, as I feel that lessens the green on black effect of the fabrics. You may have a different opinion; fair enough. So I used black thread (you may have to zoom in to see it). There is no quilting on the green fabrics at all!


For Zig Zag II, then, the blue fabrics. But to throw in a little twist, I decided to reverse the triangle pattern. What does this mean? See how the long edge of the green fab is on the top of each triangle on the left side, but on the bottom of each on the right? So, I wanted to do the opposite for this one. Note: the short side still needed to be in the center. And you can't just "spin" the template / triangle set; if you do, it will still come out the same way! It has to be flipped so that the side facing the fabric when the greens were cut is now face-up when cutting the blues. This results in the long edge of each blue triangle being on top on the right side but on the bottom on the left. Other than that, everything else was done the same.


 12 years later, I can finally cross this one off my list!


Monday, February 5, 2024

Calliope

Wanted to do something colorful, and also visually interesting. I came up with six possible designs all based on the same theme of pairs of fabs / colors in a series of rows. At Thanksgiving, I printed them out and had the family vote on which one they liked best. There was a clear majority on one of them; alas, not the one that I had wanted.

These designs were all based on 11 rows and 41 across (an odd number so that the left and right columns would have the same color-strip. So, in this case, 42 was NOT the answer to everything). The 11 and 41 worked well with the planned size of 2.5 x .75 for each of the "full" pieces. The idea to add interest was to then have some rows with "half-size" pieces (these thinner pieces are 2.5 x 0.375)....thus 82 in those rows.

The family liked the idea of double symmetry:  top to middle to bottom (though there is only one middle row) and left to right. So that is the one I went with.

As I normally do, I designed this using Excel, and just put in colors that contrasted enough to be obvious; not necessarily the actual colors I would finally use (although I did like the black-white combo).

This was a quilt I made just because I had the time on my hands, and I wanted to use some fabs from my stash. However, if you do the math you can see that for each color:  

20 pieces (each color) per row * 2 rows * 3" x 1.25" (cut size) per piece = 150 square inches. So that is not even a 6" cut across the width of the fabric. 😂😂😂😂 This made hardly a dent in my stash!

I started out picking what seemed like appropriate colors. Put some samples up on the quilt wall. Nope...swapped this one for that one...nope...these clash too much. Decided early on to go with mostly solids and small scale / subtle batiks....did not want the fabric patterns to distract from the overall strip pattern. 

Somewhere along the line I decided that I needed a little more interest (tension? focus?). I briefly considered throwing in a non-matching piece here and there, or making one or more columns the same strip part of the way up, but that approach didn't please me. 

So I decided to do a horizontal reverse in the four split-rows (numbers 3, 5, 7 and 9). For example, in the black and white rows it would be (split) white/black white/black white/black......then a full white (which reverses the pattern), so then black/white black/white-black, etc. til the middle when it would reverse again, and then reverse again on the other side. So these rows break up the symmetry of the other ones.

Easier to see (below) than to explain.

For the assembly, there are clearly a LOT of seams. In most quilts, you assemble the rows first and then join them together.   But doing so here would have meant matching 41 seams!!!! So it just made more sense here to assemble the COLUMNS first, and then join them going across; only 11 seams to match up.

I had originally planned to not have a border. The batting happened to be a scrap of black batting that had long sat in my batt pile. When I laid the quilt top on the oversized batting before I trimmed it.....boom! It needed a black border! That made the colors pop. So a little extra cutting, pinning, and sewing and then I was ready for quilting. 

And like many of my quilts, the point here is the colors and the pattern itself. So it was an easy choice to use the transparent monofilament thread, in the ditch, across each row.

Ta da:


And the name?  Once the piece was finished it organically (get it?) popped into my head. Wikipedia defines a calliope as "....typically very loud. Even some small calliopes are audible for miles. There is no way to vary tone or loudness." That pretty much sums up the impact of this quilt.

Now I just need to find a place to put it! 


Saturday, July 29, 2023

Baby Blooms

This quilt is for baby Isabella, sister to William (whose quilt I made exactly 2 years ago). 

The parents asked for a flower theme, with pastel colors.

We looked around and found this pattern on the internet at Sew Fresh Quilts. However, as written, the finished quilt would be 63" x 83"!  That's a tad too big for a baby quilt.  The odd size is also a result of each block finishing at 8" x 15". Definitely not your normal square block!!!

Initially, I thought I could just scale down the blocks, to maybe 4" x 7.5". But with all the pieces in each flower, that would have been very difficult to make and the effect of the different colors / patterns in each flower would have been practically lost. 

Instead, I just reduced the pattern from a layout of 5 across and 4 down to one of 3 across and 3 down. This gave me a finished size of 38" x 60". Five feet is still pretty long for a tiny girl to drag around, so maybe they will just hang it on the wall.

The petals of each flower are made of 4 different fabrics. So we decided to make two sets: 5 of the flowers have one grouping of the same four fabs, and the other 4 flowers have a different set of fabs. The leaves and stems are the same for all nine flowers.

I free-motion quilted each of the blossoms using a pastel variegated thread. For the leaves, I used a modified zig-zag stitch and sort of randomly eased my way across each (twice) to simulate the ribs.

The sashing is white-on-white with tiny stars (we were not able to find white-on-white with flowers!). But the outer border does have tiny white flowers on a light teal (mint?).

And on the bottom, I added an "Isabella" monogram, also in variegated pastel threads.


A very happy quilt! Hope you love it, Isabella!  

Monday, March 6, 2023

Moby Quilt

Paper piecing!  Curves!   3D - Op Art!

What could be better!

This excellent pattern from Audrey Esary was actually pretty easy to do. 


Each black and white strip is cut oversized, sewn into place, and then trimmed.  You basically do two mirror-image sets of the same half-spiral. Then they are joined around the central "eye", with just a little bit of partial-seam finagling. 

The only really "tricky" part was then getting the center circle "embedded" into the outer border. YES! That is one solid piece of fabric with a center hole cut out. I had to flip the pieced center and work backwards and around the border, easing into the curves. It actually worked!!!

For the quilting, I did not want to detract from the visual impact of the mobius itself, so I did parallel vertical lines using clear mono-filament thread. But to reinforce / echo the expanding bands in the mobius design, I gradually increased the distance between the stitched lines, going from .5" at the central section to 1.25" at the edges.

The finished piece (26" x 26") was then mounted on stretcher bars. 

Saturday, August 6, 2022

Rainbow and Dove

Olive is daughter number 4 for Emily's friends Ken and Melanie, joining AveryElizaand Ivy!

As with the other three girls, I was delighted to make a quilt for Olive. And Melanie had a definite idea of what she wanted.  

If you looked at those links above, you might have noticed that Ivy was born at the end of 2013; Olive in November, 2021, so there was quite a time span between the two.  I knew the reason why, but asked Melanie to tell the story in her own words:

For sweet Olive, she’s our rainbow baby. When you have a baby after loss, they’re called your rainbow after the storm. We lost two babies early on in my pregnancies and didn’t think we would have any more kids. We trusted God’s plan was greater than ours. When Olive showed up, it took a while to believe she was going to join us earth side because of the fear of another miscarriage. But day by day, she grew and when she was born, she indeed was (and is) a rainbow. 


To add to this imagery of beauty after pain, or through pain, Olive stands for peace. When God sent a dove to Noah after the flood with an olive branch to symbolize peace, and that the earth would not flood again, Olive is peace to our family. That fear and pain don’t identify me, that change and hope can endure. That good and beautiful things can happen again. I was very anxious during her pregnancy, and when she was born, a calm came over me of contentment, completion, and peace. Her soul brought God’s promise to us. 

The back fabric, black with hand drawn magnolias is designed by a local female artist, @walkingmanstudios and printed by @elliegaytor, another female owned local business. During the pandemic, I sewed many masks with this fabric as well. Magnolias are special to me because on one branch of a magnolia tree, there are blooms and buds, and blossoming at different times. It makes me thinks of my daughters and how they too grow and blossom in their own time, but tethered together on one branch, or one family. 

----------------------------------------------------------
Here is the result of our collaboration:


Close up of the dove, including the very special "olive" branch!


The process:
I first looked for a pattern for a dove. There are a number out there, but many are done via applique (not my preferred method).  I eventually found one by Amy Friend, and it was a paper-piecing pattern. Also, it was 10" x 10", so a nice size to build around without having to scale it up! There are 47 pieces in this pattern (including the blue background).  I chose an off-white fabric that had sweet little hearts.  Of course, I added on the Olive branch! 

The whole quilt background is sky blue, with fuzzy clouds, and itty-bitty stars. Perfect, because rainbows and doves are found in the sky! 

For the rainbow, I modified a pattern from Counted Quilts.  The original had this rainbow (sort of) with a big yellow half sun in the upper part of the pattern. I redesigned it to swap in the dove for the sun, and tweaked the rainbow pattern itself.  

I did random sorta-clouds freeform quilting in blue thread on the background. Then I just did a ditch around each rainbow strata, and the heart, in a matching color. 

As noted above, Melanie picked the back fabric. Often I will use the back fab as a border on the front; this time that just was not going to work.  I considered using the clouds fab, but eventually nixed that as well.

For the same reasons, it did not make sense to do a regular binding. So I decided to use the facing binding technique.  This is where the binding is actually folded onto the back, so that none of it shows on the front of the quilt.  However, in all the times I've used this technique, I've never done it with a hanging sleeve. So, back to the internet for some guidance. I actually found one hit on how to do this, from Lyric Kinard. It took a few tries using a scrap fabric model to figure out exactly how to make this work (and I made a few mods to her pattern while doing so). But it actually did the trick! And careful cutting of the magnolia binding strips ensured that all of the blossoms were facing the correct way when the bindings were flipped over. Whew! The bottom and two sides were hand-stitched using black thread. Because the sleeve has to hold the weight of the quilt, I wanted to do something stronger there. I had cut it big enough so that it just overlapped one of the horizontal piecing seams on the front. Thus, I was able to machine sew it in place using clear monofilament thread right in that ditch. So you don't actually see it on the front, but it is there and doing the job.

So there you go, Olive. Hope you like it.  And may you bring many years of love to your family.


Thursday, May 26, 2022

En Pointe!

Got a commission from a former colleague for her niece's daughter. 

The basic specs were:

Colors: very neutral: ivory, white, and a hint of blush

Theme: ballerina

Monogram: initial only


I was working on one quilt and had another in the queue, so I just let the idea simmer for a while.

And one day I started doodling  and it just magically appeared!


ON POINT squares!  In quilting "on point" means that the blocks are turned so that they are diamonds instead of squares. 
In ballet, "en pointe" means that the dancer supports all of their weight on the tips of the toes (with special shoes of course). 


So the idea would be to find suitable ballet fabrics and cut and arrange them to be both on point and en pointe.

We found some perfect fabs....with ballerinas and sparkles! These are alternated in the "solid" squares.  The squares are 8" finished (which turns into approx 11" when on point). The ballerinas were small enough that it was not really necessary to fussy cut them to fit. 

The other large squares feature a pattern of pastel colored flowers. The back is made up of ballerinas on music boxes. You can almost see them spinning and hear the music!

For the small square centers, we found a pink (with little dots) fabric. I appliqued these on (with some batting underneath) in the same way that I did the circles in the "Circular Spectrum #72" quilt. But this time I fastened them using a decorative zig-zag stitch.

When I laid out all the squares, I realized that the pinks and whites faded into each other too much; there was no clear definition of the diamond shapes. We had picked out a light blue fabric for the border, so we decided that we could also use it for sashing strips between each block. At 3/4" finished, this meant the blocks were now about 13.5" finished!  Uh oh!!!  Will it be too wide for the backing fabric????  I really couldn't tell until I had it all sewed together, including the side triangles and corner pieces and borders. I barely had enough of the blue to do the sashing and the border. Whew!

When I laid it out, there was about an inch overhang (of the back) all around.  Quilters know that you should always leave several inches, as the size of the quilt can change as you quilt it (depending on how and how densely you do so). I came up with a plan to add borders to the back if it turned out that there was an issue. Luckily, when it was all done, there was still enough of the back fab overhang to be workable. Whew 2!

For the quilting, I chose to do free motion. In the ballerina squares, I used pink thread (in the pink fab) and white thread (in the white one) and carefully quilted around each of the figures. In the flower squares, I just did random quilting with white (but nothing in the dotted-pink squares).      

Here is the result:


Finally, note that the center square has a large monogrammed "B". I don't think I have ever put a monogram in such a prominent place before. It is actually part of the design. 

Is it for ballerina? Maybe, but also for the baby's name: Betty!!!!!!!!!!!!!!!

This is just tooooo cute.


Friday, April 22, 2022

Kits and Cubs

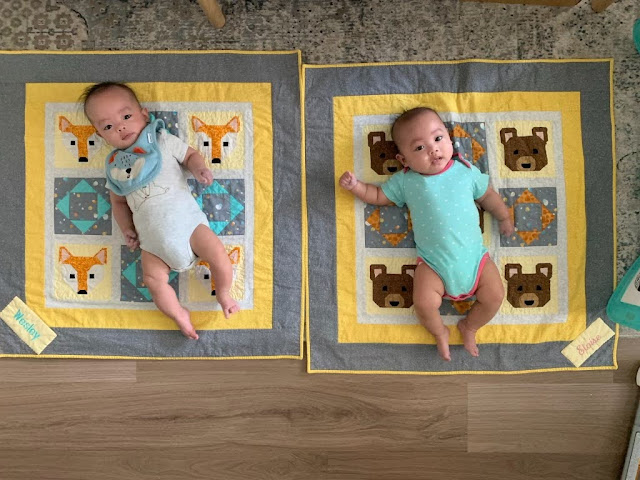
This is the THIRD time I have been tasked with making quilts for twins!

The request was both specific ("We like foxes and bears") and vague ("in neutral colors like beige and gray").

So off we went in search of patterns for a fox and a bear. The thought was to make the "same" quilt for each, one with foxes and one with bears.  So blocks was the logical option (as opposed to each quilt having ONE large animal on it). Surprisingly, there are not that many fox and bear blocks out there!

We finally found some really cute ones on Etsy from Burlap and Blossom Patterns. They have some  adorable animal head patterns!

So these make either 6" or 12" blocks. We decided to do 6" blocks (because 12" would have just been too big), and alternate them with some geometric pieced blocks.  I came up with an interesting design and we laid it out with appropriate sashing. 

Each Fox and Bear head block contains more than 40 pieces, and took an average of 90 minutes to assemble. 

We used the same perky gray for the pieced blocks on both quilts (but changed colors on the inner diamond), as well as the same fabrics for the animal heads background, the sashing, and the inner and outer borders (along with the pink in the ears). So while each quilt is unique, they do make sort of a matched set. Kind of like twins!!


Kits......


...and Cubs


Those fabs were a combination of ones we had in the stash plus others we bought at Quilter's Heaven

We really lucked out on the fabric for the back. We wanted to use the same fabric for both, but also wanted it to tie into the front. We first looked for forests / trees, but eventually stumbled onto one which had trees plus BOTH cute foxes and bears!! OK...it also has deer, which is fine....


...but can someone explain why it has lions as well???  The Etsy site said that the seller was in CHINA (maybe there are lions in Chinese forests?), and that delivery would take 4 - 6 weeks. I was a bit leery about ordering, but it was sooo perfect, so we did. Guess what? It actually arrived in about 10 days. Supply chain? Hah!!!

For the quilting, I did free-motion in the yellow head backgrounds using a subtly variegated yellow-white thread. I used a gray thread in the ditch around the inner and outer squares of the pieced blocks. And I ditch quilted around the inner border using the same variegated thread. 

Added the monogram bars to the corners and they're ready for delivery to Eloise and Wesley!


Sunday, March 6, 2022

Reach For The Stars


Just a sweet quilt!


And here she is!!!


Now the quilt is even sweeter!!!!!


Tuesday, February 1, 2022

Succulent Variation

Friends of ours were travelling in northern Michigan last fall when they happened to stop in at a local quilt shop (though they are not quilters).  Inside they were drawn to a large quilt hanging on the wall. It was made with Kaffe Fassett fabrics, and they loved it! His fabrics are generally bold and bright, and feature a lot of floral motifs. So they snapped a pic, and when they returned home, asked me if I could do one like this I previously made a bedspread-sized quilt for them back in 2011 (Wondrous Waves). 

They told me the name of this pattern was "Succulent", hence the name of this quilt.  However, the published pattern includes all of the required fabrics using a blue colorway (23 different fabrics in all!).  The one in the store was made with more reds and yellows. My friends wanted something more like that. 

Since we had to find new fabs anyway, and because she wanted the quilt to be slightly bigger (at 92 x 84) than the one in the pattern, we decided to make some design modifications. It is still made up of smaller (4") squares and larger (8") squares. But, in order to get the size she wanted, the borders needed to be 6". So the new design featured 16 smaller squares (per row) and two larger squares (per row spanning two rows each). In total, there are 18 rows. Because of the large size, I knew that I would make this in four sections using my Quilt in Sections technique. 

Then we had to find the right fabrics. She looked on-line and we went back and forth, and eventually agreed on 11 fabrics for the small squares and 5 for the large squares (one of which was also used in the borders, the binding, and the back of the quilt).  Most are red, some are dark blue or dark green, and one is bright green. She wanted this last one for some "pop" in the design. We ordered some from that same quilt store, but had to get the rest from several other sources.

Next came the challenge of actually laying out what went where.

Can't have a large "border" fabric sqaure right next to the border!

Can't have the same smaller square fabric adjacent (or even touching diagonally) to itself in two rows.

Can't have too many green pops!

The large squares had to be randomly placed.

There must be two large squares for each full row pair

Keeping in mind that I would do it in quarters, each "quarter" row pair actually called for 16 small fabrics and one large one. Sharp eyed readers will immediately notice that 11 (different fabs) is not a multiple of 16! So each quarter row pair had to have all 11 fabs plus 5 repeats! Not adjacent, not diagonal. In the next row pair down, I then tried to use a different "plus 5" than in the row above (or to the right) while still being frugal with the green pops.

Here are each of the 4 sections after piecing (including borders!) and quilting:


Upper Left


Lower Left


Lower Right


Upper Right

For the quilting, I used a variegated thread with reds and oranges. Even by the blue and green squares, the quilting line is pretty hidden. I quilted in the ditch both horizontally and vertically for every row and column. However, I did not quilt into the 8" squares.    

When all the quilting was done, I joined the two upper quarters together, then the two lower quarters, and finally the two halves together. A regular flip binding and it was all finished!


Sunday, October 31, 2021

rainboW Weave

In our den we have a U-shaped sofa. The sides are chaise length, and induce instant torpor when anyone stretches out on them.

Last year, during the height of the COVID quarantine, we decided to make a lap quilt to make daytime napping even comfier. The result was Circular Spectrum #72

Of course, once we had one made, it was only a matter of time until there had to be a second one (for the other, cold, lonely chaise). 

We wanted a pattern that would allow us to use the many, if not all, of the colored fabrics, and the same two background colors. It had to be a complimentary quilt (same size and feel), but unique as well.

Somehow, we did a web search and found the answer within 30 seconds! That never happens!!  We chose a weave (or lattice) pattern.

Knowing that Circular had a rainbow of colors that went from upper left light to lower right dark (through the spectrum), we decided to arrange these colors the same way.

Pawing through the stash we managed to find all of the fabrics / colors that we had used before! But in this pattern, the strips were smaller (less impactful) than the circles were, so we started to swap some out and swap in some others. We also decided to keep the same color family from top to bottom in each column, as opposed to the diagonal nature of Circular. And with 9 columns, we had to determine how best to divide ROY G. BIV.

Laying out all the possibilities (and a few more we bought from Quilter's Heaven) resulted in an arrangement of Pinkish-Red-Orange-Yellow-Green-Green-Blue-Blue-Purple (Indigo...Violet).

For the background colors, we also had some scraps, but knew we would need more. Luckily, QH had just enough on hand!

Cutting and piecing were very easy (nothing like the process in Circular). Lots of pieces to sew, but chain stitching helped that go faster. I knew that I would do the same ditch quilting as on the other one (though this time just the vertical seams), so the size (42 x 54) was manageable enough to do all in one.

The result:


And, just like with Circular, I once again went with the "facing binding" technique. So no binding is visible on the front (and it blends in on the back).

We have already tested this new addition to our family and can confirm that it is just as cuddly as its sibling!

PS: no....those are not typos in the name. It's that way for a reason. We're sure you can figure it out! 


Wednesday, September 29, 2021

A Puuurrrfectly Friendly Lion

 My sister-in-law Lisa asked me to make a quilt for her husband's cousin's new grandson.

Originally, the new parents wanted a panda quilt.  And they wanted it to be "stroller size".  ??? Never heard of that. Sounds like the size of a large placemat. 

And they were very specific on the colors: subtle earth tones: white, ivory, wood, sage & eucalyptus green, grey, beige, oat, taupe; nothing bright.  

I came up with a couple of options for patterns and Lisa and I went back and forth, trying to find the right pattern and the right colors. Those colors don't really work with a panda (although they do love eucalyptus!). 

We had these pretty well nailed down and then the parents-to-be switched from a panda to a lion! I've done quilts that have had a lion included with other animals, but never one with just a single, large lion. So it had to look like a lion, but not be the scary kind.  Oh yeah....they then asked for "crib size". Whew!!!!

More research on the pattern and fabrics and we eventually found just the right combination:


I free-motion quilted the mane, tail, and feet with brown-variegated thread.  The rest was ditch quilted using blue, yellow, and beige as appropriate.

Subtle colors?  Check.

Crib size? Check.

Friendly and cuddly lion?  Absolutely!


Tuesday, August 3, 2021

William's Neighborhood

 Another quilt for my friend Mari's ever-expanding family of nieces and nephews!

The requirement for this one was: "a theme of Space with colorful planets, moon, stars ,etc. For the background - navy or grey, but not black."

Hmmmm.....two outer space quilts in a row!?!?!?!? (To Infinity and Beyond was my prior quilt). Suddenly they are very popular! I turned to my buddy Mr. Google to see what was out there. 

Found that "space" quilts generally fall into two groups: rockets / aliens, and planets. The first group did not really meet the specs, and were primarily applique (nope). The second mostly featured really large (like queen or bigger) quilts! Well....yeah...trying to represent the solar system in a meaningful way on a small quilt would be tough.

But then I found one that pretty much fit the bill. It was a pattern on Amazon that was actually a Kindle download! It was pretty hard to read, and had templates, so I figured I would just print it. That was when I discovered that Kindle has no printing capability. This is on the device itself, your phone, or a PC! I guess it makes sense; that's the whole point of the Kindle - to save paper - but still!

So, I used the download as a guide and developed my own pattern. The idea was to have 8 planets (sorry Pluto!!) in somewhat relative sizes and in representational colors. Now before anyone gets to astro-precise: yes.....I know the sizes are nowhere near correct relatively (nor the space between them), or this quilt would be several city blocks long. But I did the best I could.

For the most part, I took the same approach as I used for Circular Spectrum #72. I cut out the appropriate sized circle (with seam allowance), added a layer of interfacing, sewed around the edge and flipped it inside out. For each, I then put one or two pieces of batting behind it and edge-stitched it in the appropriate place on the background fabric (a perfect blend of blurry star clusters on a gray field).  

First, little Mercury:


There he is.....cratered and baked from the Sun.


Next Venus, Earth and the Moon:


Venus is a mystery, shrouded in carbon dioxide. It is nearly the same size as Earth.

Earth is that lovely blue and green gem, with a nice polar ice cap at the top. Aaaahhhh....looks so peaceful and inhabitable. 

The Moon looks on, with its many craters. 


Then Mars, the Red Planet, the Bringer of War.


 Mars is roughly half the size of Earth and twice the size of the Moon.


Next we get into the big guys in our Solar System!

Jupiter......the largest planet, the Bringer of Jollity.


A gas giant with a multi-colored surface, most notably known for the Great Red Spot. This storm has existed for (at least) hundreds of years, and is bigger than the diameter of the Earth (although in recent years it has shrunk in size).  Mine was attached with fusible webbing. 


Then, Saturn!!!!!  With its amazing rings:


This one was extra fun to do! First, Saturn has all kinds of colors in its atmosphere. So another swirly, mixed color fab seemed appropriate.  I edge-stitched that, except I left two openings on the sides so that I could slip the back edge of the ring underneath.

Then, the rings: Saturn has 7 major sets of rings, and 100s of other ringlets! Clearly, I could not even try to do those (well...not with my skill set). So I decided on one silver-sparkly ring. For this, I cut out the shape (the back of the ring actually goes behind / under the planet), and used iron-on interfacing, then another layer of interfacing on the back of that. This gave it some body and allowed me to raw-edge edge-stitch it in place. I then finished the stitching of the planet to lock in the back ring edges. 


Finally: Uranus and Neptune.


Uranus's atmosphere contains methane, which is what gives it its distinctive blue color.

Neptune's atmosphere also contains methane, and sometimes appears blue-green, but I wanted to distinguish it from Uranus, so I chose a mottled fabric. 


The quilting is a swirling free-form stitch, representing all the comets, meteors, dust, and pieces of ice that whiz through our corner of the Universe.


Here is the whole neighborhood together. The gang, in order, roughly makes an "s" shape:


You may notice that I did not yet mention the Sun. That is because I took a unique approach with it. Since it is only a quarter circle (you know....it is really BIG!), I decided to wait until the quilt was all quilted and the binding was on before I sewed it on.  This way I was able to align it exactly next to the binding on the two corner edges. I did the same fabric-interface-sew-flip-and-fold technique, but I also added 4 layers of batting! Each was cut in the same quarter-circle shape, but stepped down in size. 

The back of the quilt has all of these planets, plus comets, stars, and a smattering of spaceships (some of which may not be from Earth!):


I hope you have fun exploring your neighborhood William!